In this guide, you’ll learn how to host your blog on a subdirectory (e.g., example.com/blog) instead of a subdomain (e.g., blog.example.com). Every step here has been tested and verified to work.
Introduction
Hosting your blog on a subdirectory can improve SEO and enhance user experience.
Although there are a lot of articles that espouse the benefits of using subdirectories over subdomains, there are few resources that provide a step-by-step guide on how to actually set this up.
Why Host on a Subdirectory?
To understand why you’d want to host your blog on a subdirectory, you can read this article by ButterCMS: Blog Subdomain or Subdirectory? Hint: One is 40% Better.
There are a lot of other articles out there on this so I won’t repeat the same thing. But they all basically say the same thing: hosting your blog on a subdirectory is better for SEO because it consolidates your website’s authority and ranking power. Google has stated that they do not treat subdomains as a separate entity, but empiric data suggests otherwise. If you want to maximize your SEO efforts, hosting on a subdirectory is the way to go.
My personal experience has been similar: after moving a blog from a subdomain to a subdirectory, I saw a noticeable increase in organic traffic and search engine rankings. It took a few weeks and I’m generally confident it was because of the change, primarily because I released no new content nor promoted the blog in any way during that time.
Why Not Host on a Subdirectory?
The main reason people avoid hosting on a subdirectory is the complexity of the setup. Many blogging platforms and CMSs are designed to work on subdomains, and configuring them to work on a subdirectory can be tricky.
I’ve personally found that the setup process to be daunting. It’s a tricky process and you have to follow the instructions laid out here really carefully. After having previously changed a blog from a subdomain to a subdirectory, I’ve found myself too lazy to do it again for taikohub.com.
If you still think it’s worth your time, then read on.
Steps to Host Your Blog on a Subdirectory
Lets say you have two sites right now. One is example.com and the other is blog.example.com. You want to host the blog on example.com/blog instead of blog.example.com.
Your blog (blog.example.com) is a Next.js app hosted on Vercel. Your main site (example.com) is a static site hosted on Render. Although Vercel and Render are used as examples here, the steps are nearly identical for other hosting providers. In fact, you do not actually need to go into your hosting provider at all for the actual setup. Everything that needs to be done can be done from the Cloudflare Dashboard, and from the comfort of your text editor.
Important: Note that Cloudflare often changes their dashboard UI and routes. If you find that the steps here do not match what you see on your Cloudflare Dashboard, just use the search function in the dashboard to find the relevant section.
Step 1: Set Up DNS Records for the Main Site
First, you need to set up the DNS records for your main site (example.com). Again for this example, lets assume you’re using Render for your main site. If you do not use Render, then follow the equivalent steps for your hosting provider. Generally this should be in their docs.
-
Go to your Cloudflare Dashboard. Click into your domain, then SSL/TLS, then Overview. Then click “Configure”.
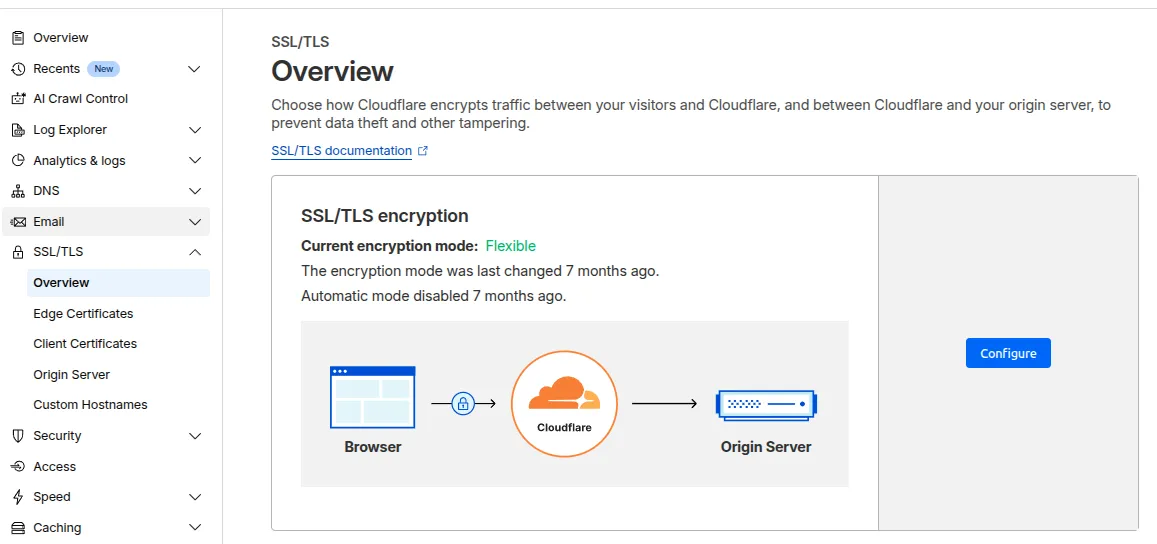
-
Next, select “Custom SSL/TLS” then select “Full”.
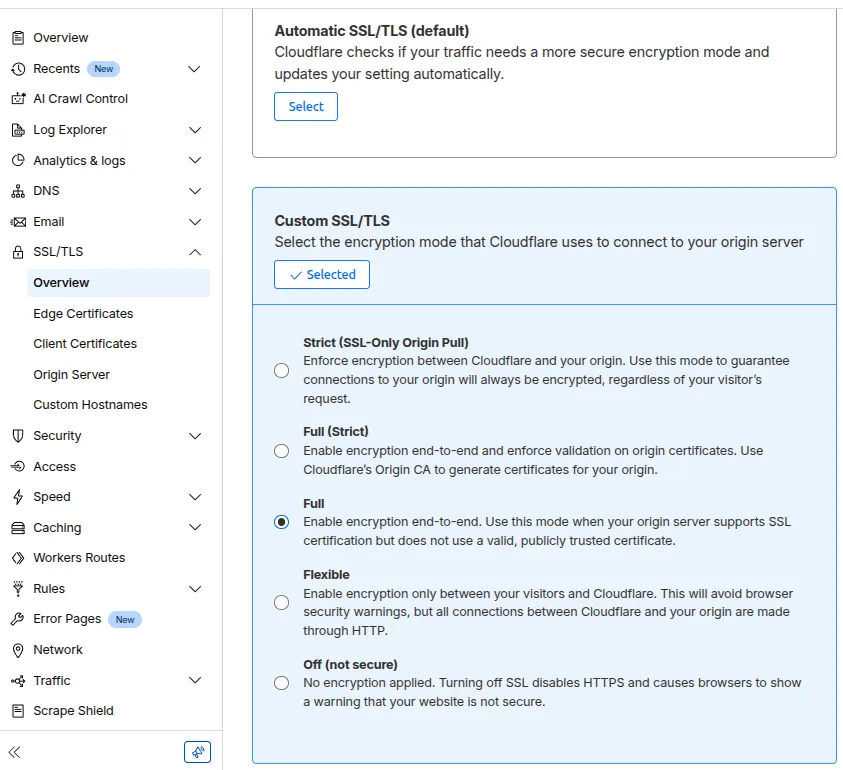
-
Go to DNS records in the sidebar by clicking on “DNS”, then “DNS Records”. Then click “Add Record”.
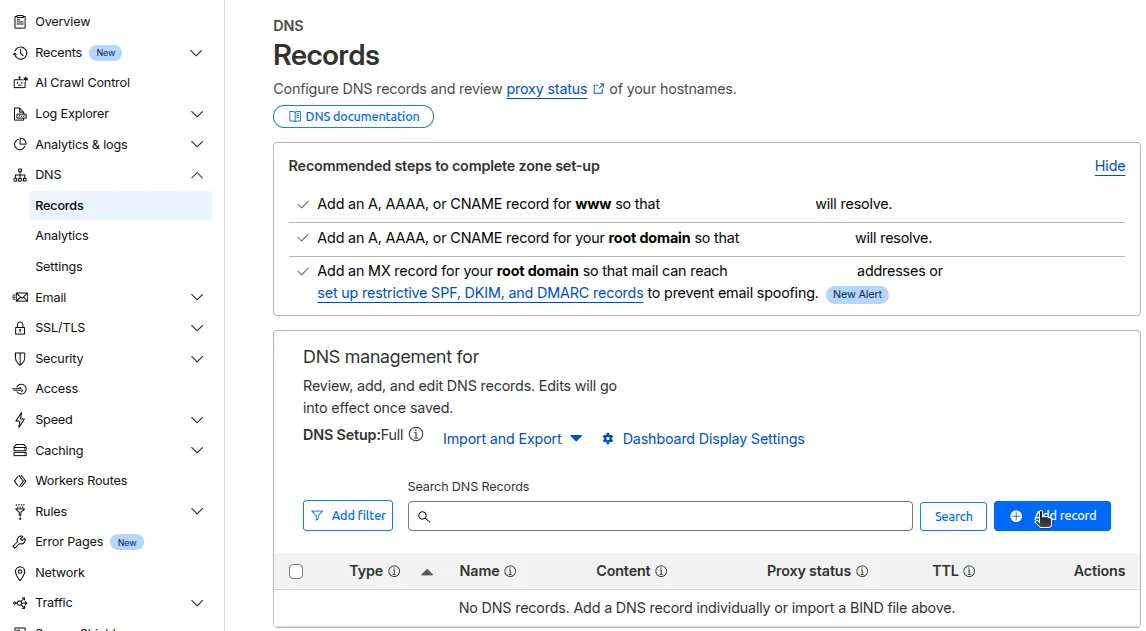
-
Add the following DNS Records. Replace
my-site.onrender.comwith your Render service URL for your main site. If you have other applications such as an API, add those as well. Note that it’s important you set the “Proxy status” to “Proxied”. It’s also important you do NOT add a wildcard record (eg.*.example.com).Type Name Target Proxy status TTL CNAME @ my-site.onrender.com Proxied Auto CNAME www my-site.onrender.com Proxied Auto CNAME api my-api.onrender.com Proxied Auto
Step 2: Set Up DNS Records for the Blog
-
First, make sure your blog is already accessible on a subdomain (eg. blog.example.com).
-
Next, add another DNS Record for the blog. Replace
cname.vercel-dns.comwith the CNAME target provided by the hosting provider for your blog.Type Name Target Proxy status TTL CNAME example.com my-site.onrender.com Proxied Auto CNAME www my-site.onrender.com Proxied Auto CNAME api my-api.onrender.com Proxied Auto CNAME blog cname.vercel-dns.com Proxied Auto
Step 3. Configure Your Next.js Blog
Ensure Correct Routing for Static Assets
- Make sure that your Next.js blog’s router points to
/and not/blog. You should NOT have any routes that contain/blog. Edit thenext.config.jsornext.config.mjsfile and addbasePath: "/blog"to the config./** @type {import('next').NextConfig} */ const nextConfig = { basePath: "/blog", // Add this line images: { remotePatterns: [ { protocol: "https", hostname: "imagedelivery.net", }, ], }, redirects: async () => { return []; }, }; export default nextConfig;
Step 4. Add a Cloudflare Worker
-
Go to Cloudflare Dashboard. Click “Workers & Pages”. Click “Create” then click “Create Worker”.
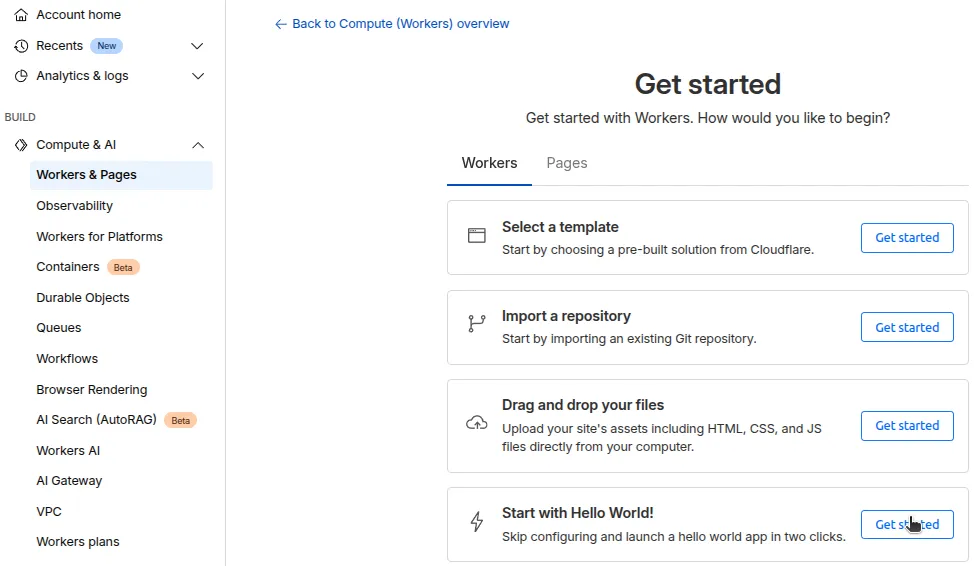
-
For the purpose of this blog post, we’ll go with the easiest option by selecting “Start with Hello World!”. For production applications, consider using Git. It looks like the following. Lets name it
blog-worker. Then click “Deploy”.// worker.js /** * Welcome to Cloudflare Workers! This is your first worker. * * - Run "npm run dev" in your terminal to start a development server * - Open a browser tab at http://localhost:8787/ to see your worker in action * - Run "npm run deploy" to publish your worker * * Learn more at https://developers.cloudflare.com/workers/ */ export default { async fetch(request, env, ctx) { return new Response('Hello World!'); }, }; -
Now replace the code with the following:
export default { async fetch(request, env, ctx) { async function MethodNotAllowed(request) { return new Response(`Method ${request.method} not allowed.`, { status: 405, headers: { Allow: "GET", }, }); } // Only GET requests work with this proxy. if (request.method !== "GET") return MethodNotAllowed(request); // Get the URL that was just requested. const url = new URL(request.url); // Swap out the subdirectory with the subdomain to request the actual URL. const originUrl = url.toString().replace( 'https://example.com/blog', 'https://blog.example.com/blog' ).replace( 'https://www.example.com/blog', 'https://blog.example.com/blog' ); // Fetch the origin. const originPage = await fetch(originUrl); // Return the subdomain, as the subdirectory. const newResponse = new Response(originPage.body, originPage); return newResponse; }, }; -
Change the URLs as needed. To save, click on the version ID hash (eg.
b30983e0) then click “Apply”. -
To deploy the changes, go to the worker dashboard. Click “Deployments”. Look under “Version History”. Click ”…” then “Deploy” on the latest version.
Version ID Created Version & Git Message Source vb29485e0 3min… Update to … Dashboard ”…“ vf859f2e0 2h… Updated Script Dashboard ”…”
Step 5. Connect Next.js Site with Cloudflare Worker
-
Go to “Worker Routes” in the Cloudflare Dashboard sidebar. Click on “Add Route”.
-
Add the following route for the blog content:
- Route:
example.com/blog* - Worker:
blog-worker. This is the worker you just created.
- Route:
-
Add another route for the static assets:
- Route:
example.com/blog/_next/static* - Worker:
blog-worker
- Route:
You should now be able to access your blog at example.com/blog. If this works, congratulations! You’ve successfully hosted your blog on a subdirectory using Cloudflare Workers.
Configure Search Engine Robots.txt in Your Next.js App
-
Now that you’ve successfully hosted the blog on the subdirectory, you need to make sure search engines don’t index the subdirectory.
-
Update your
next.config.jsornext.config.mjsfile./** @type {import('next').NextConfig} */ const nextConfig = { basePath: "/blog", images: { remotePatterns: [ { protocol: "https", hostname: "imagedelivery.net", }, ], }, redirects: async () => { // Add this block return []; }, async headers() { // Add this block return [ { source: '/:path*', headers: [ { key: 'X-Robots-Tag', value: 'noindex, nofollow', }, ], }, ]; }, }; export default nextConfig; -
Now update your cloudflare worker.
export default {
  async fetch(request, env, ctx) {
    async function MethodNotAllowed(request) {
      return new Response(`Method ${request.method} not allowed.`, {
        status: 405,
        headers: {
          Allow: "GET",
        },
      });
    }
    // Only GET requests work with this proxy.
    if (request.method !== "GET") return MethodNotAllowed(request);

    // Get the URL that was just requested.
    const url = new URL(request.url);

    // Swap out the subdirectory with the subdomain to request the actual URL.
    const originUrl = url.toString().replace(
      'https://example.com/blog',
      'https://blog.example.com/blog'
    ).replace(
      'https://www.example.com/blog',
      'https://blog.example.com/blog'
    );

    // Fetch the origin.
    const originPage = await fetch(originUrl);

    // Return the subdomain, as the subdirectory.
    let newResponse = new Response(originPage.body, originPage);

    // Remove "noindex" from the origin domain.
    newResponse.headers.delete("x-robots-tag");

    return newResponse;
  },
};
Step 6. Check that Everything Works
-
Go to Vercel Dashboard and find the URL for the deploy (eg.
https://vercel.com/my-projects-30d8ek3n/my-blog/d934nfid9823sbsNgoMnOOnsiKxn). Open the URL and go to “Network” then check for existance of a “X-Robots-Tag” header. If it’s not there, then your Next.js app is correctly configured to not be indexed. -
Finally, go to Google URL Inspection Tool and check that the subdirectory is indexed (Google URL Inspection Tool). Enter the URL of the subdirectory (eg.
example.com/blog). Check that it’s indexed.